Exploring Antibiotic Resistance

AUSTRALIAN CURRICULUM ALIGNMENT:
-
Infectious disease differs from other diseases (for example, genetic and lifestyle diseases) in that it is caused by invasion by a pathogen and can be transmitted from one host to another (ACSBL116)
- Pathogens include prions, viruses, bacteria, fungi, protists and parasites (ACSBL117)
- Pathogens have adaptations that facilitate their entry into cells and tissues and their transmission between hosts; transmission occurs by various mechanisms including through direct contact, contact with body fluids, and via contaminated food, water or disease-specific vectors (ACSBL118)
BACKGROUND:
The discovery of Penicillin was a major game-changer for the human race in the twentieth century. With the sudden discovery of antibiotics, we gained a weapon against an invisible enemy. Since that first discovery of Penicillin, many other antibiotics have been developed for use against the broad range of pathogenic microbes; each with their strengths and weaknesses. Unfortunately, this weapon has become blunted from overuse in the past decades; leading to antibiotic resistance.
In this practical, students will investigate a selection of antibiotics and observe the efficacy of each against E. coli. Students will gain experience in aseptic technique. Furthermore, students will have the opportunity to understand susceptibility, resistance and inhibition as the words relate to microbes and antimicrobials. They will also gain an understanding that antibiotics are not universal - one that works against one species of bacteria may not work against another.
PREPARATION- BY LAB TECHNICIAN:
- Aliquot the bacteria into the appropriate number of sterile vials.
- Using sterile petri dishes or vials, separate the discs by antibiotic type. Label them for easy identification.
- Distribute the bacteria and antibiotic discs to each student or group to avoid contamination between groups.
METHOD- STUDENT ACTIVITY:
- Use aseptic technique - wipe your bench down with 70% Alcohol and keep your work near the Bunsen burner to take advantage of the updraught the flame will create to waft potential contaminants away from your materials.
- On the bottom of one of your agar plates, use a marker to divide it into four segments. Label the segments A, B, C and P. Remember to put your name and date on the plate.
- The other plate will be your control. Name and date this plate also.
- Using your sterile pipette, aliquot about two drops of the bacterial broth onto each of your plates and use the spreader to cover the plates evenly. If you are using a glass spreader, pass it through the flame of the Bunsen burner before each use.
- Wait 10-15 minutes before placing the discs on the plate to ensure bacteria has a chance to dry.
- Flame your forceps and pick up one of the antibiotic discs.
- Place it in approximately the middle of the appropriate segment of your divided plate and push (very gently) with the forceps to help it stay in place.
- Repeat for each disc, flaming the forceps between each disc.
- Your plates will be incubated for 24 hours at 37°C, upside down so that the agar is at the top.
- Measure the diameter of any zones of inhibition.
OBSERVATION AND RESULTS
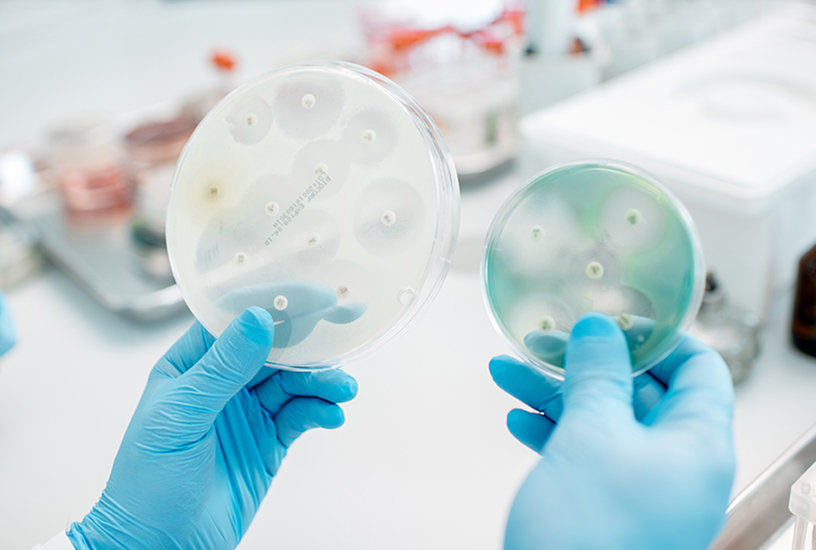
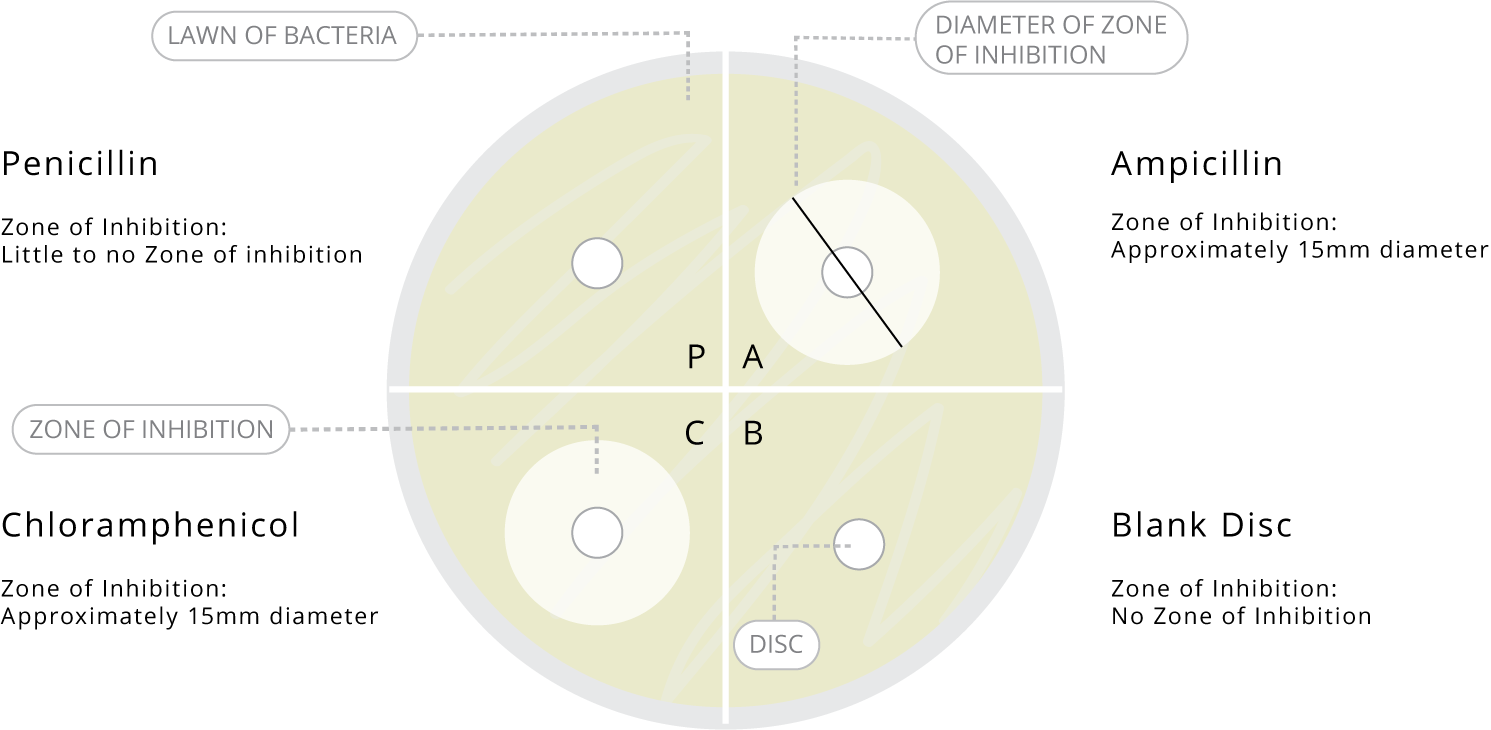
After a period of 24 hours, the control plate should have an even lawn of bacteria over the surface, while the experiment plate should show a lawn over most of the plate except for rings around the Ampicillin and Chloramphenicol discs (the zones of inhibition). Included below is a guide of the expected results and diameters.

TEACHER'S NOTES
Ensure your students have a good grounding in aseptic technique. If the vial of bacteria is to be shared around the class rather than aliquoted out, it is particularly important that they each use a fresh sterile pipette for each dip into the culture to reduce the chances that the last groups experiment will be contaminated. Once the plates are inoculated, the lids may be taped down as there will be no need for them to be opened after that point until it is time to sterilise everything at the end.
INVESTIGATIONS
- Challenge students to explain the function of the control plate in the experiment. Students may be able to recognise that the control plate would come into play should there be no bacterial growth at all on the experiment plate. A lack of growth on the control plate signals a problem with the bacteria, or an error in inoculation or incubation. No growth on the control plate may indicate the antibiotics were too effective. This can occur when the discs are placed on a very wet plate. In this case, the antibiotics impregnated in the disc may diffuse too far across the plate.
- Ask students to explain why the glass spreaders were passed through the flame of the Bunsen burner before each use. They should be able to identify that the flame should destroy any contamination that may otherwise be transferred to the plate.
- Lead a class discussion to explore the significance of a zone of inhibition and which antibiotic used in the experiment had the greatest zone of inhibition. Students should gain an understanding that the antibiotics diffuse from the discs onto the agar, creating a gradient of concentration highest near the disc and decreasing as the radius expands. The point at which the concentration is too low to inhibit the bacteria will be shown after incubation as the diameter of the zone of inhibition. Where there is no growth in this circle, the bacterium is “susceptible” to the antibiotic, and becomes “resistant” at lower concentrations. If there is no zone of inhibition, then the bacterium is considered resistant to that antibiotic, while a small zone may indicate minimal or moderate susceptibility.
EXTENSION EXERCISE
A great way to extend this practical is to compare various antibiotics against a variety of bacteria. To do this, you can soak blank discs in other antimicrobial liquids such as tea tree oil or bleach or different types of honey (i.e. raw vs pasteurised, or Manuka vs leatherwood) to test their efficacy. Additionally, using Ampicillin Powder, you can make different dilutions using sterile water to identify the most efficient concentration. Carefully label each segment on your plate when using blank discs as the discs themselves will be indistinguishable from each other.TEACHER TIP
Swabs can be used instead of pipette and spreader to create the microbial lawn; although it is more difficult to get the plate evenly covered. It can be a great way to make your bacterial culture go further if you are on a budget, as this technique generally uses less of the bacteria.
- Forceps
- 70% Alcohol
 Safety Requirements
- Bacteria from Southern Biological are all risk group 1, so they should pose no threat to the students; however, it is best practice to assume that contamination with a pathogen may occur and take precautions accordingly.
- Sterilise all work surfaces with 70% Alcohol before and after the experiment.
- Wear appropriate personal protective equipment (PPE).
- Know and follow all regulatory guidelines for the disposal of laboratory wastes.
- Work near the Bunsen burner to take advantage of the updraught of the flame to waft potential contaminants away from your materials.
